Puzzles! We are a puzzle-loving family. We have oodles of them, everywhere. We recently even hosted a puzzle party and invited 23 of our cousins. Yes, we are a nutty puzzle family. But there is great value to working puzzles with your children. Puzzles help with problem solving, spatial reasoning, fine motor skills and identification of shapes and patterns. They can also aid in sorting abilities, memory and even pre-math skills …yes really, I read it on the internet. 😉
And last, but certainly not least, puzzles are fun. Discovering something new, the feeling of accomplishment, the time spent with members of your family working together.
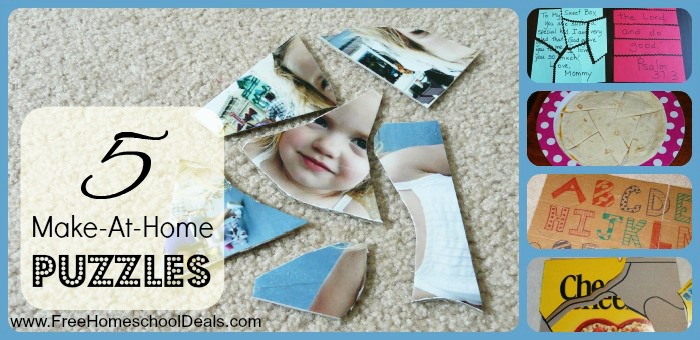
But some puzzles can be expensive. So let’s take care of that right now. Here are 5 Make-At-Home Puzzles to help draw your children into a love for solving puzzles.
Puzzle #1: The Cereal Box Puzzle
In our house, this is an easily identified object. Cereal boxes are great for homemade puzzles. For all the puzzles below, cut the shapes and sizes based on your child’s ability and age.

1. Separate and cut the front and back of the cereal box. The front piece will be your puzzle picture and the inside of the back piece will serve as your puzzle guide and base for younger children. Before cutting into smaller pieces, trace the outline of the front picture on the puzzle base to create a guide.
2. Cut the front side into a puzzle.
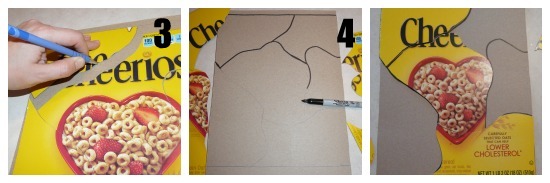
3. Trace the individual pieces onto the puzzle base with pen.
4. Then go over your lines with permanent marker.
Puzzle #2: The Reinforced Photo Puzzle
Grab some cute photos of your kids or prints from your latest vacation and start creating this photo puzzle.
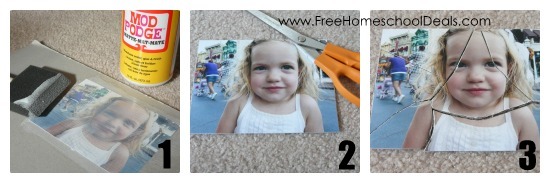
1. With Mod Podge and a brush, adhere the photo to a thin piece of cardboard. Apply a coat of Mod Podge on top of the photo and let dry completely.
2. Once dry, trim the photo of excess cardboard and cut the photo into a puzzle.
For our puzzle party, we made popsicle stick photo puzzles. You can see them here.
Puzzle #3: A Secret Message
Deliver an envelope filled with puzzle pieces to your little spy and let them figure out a secret message. Your message could be a little love note, a verse to learn or fun facts for a class subject.
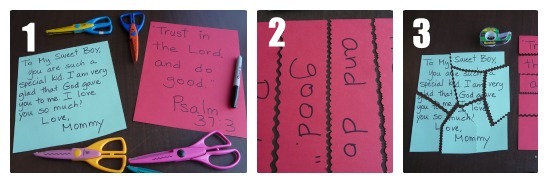
1. Write a message on a piece of card stock.
2. Using a variety of scrapbooking scissors, cut the puzzle. For ease, I kept the outer sides of the puzzle as untouched straight edges. This will make it easier to differentiate side and center pieces. However, I did use different scissors for all interior cuts.
3. For more intricate puzzles, tape the pieces together as your child figures it out. Card stock can slide around easily.
Puzzle #4: A Puzzle to Snack On
Need a study break? Try snacking on a quesadilla puzzle.
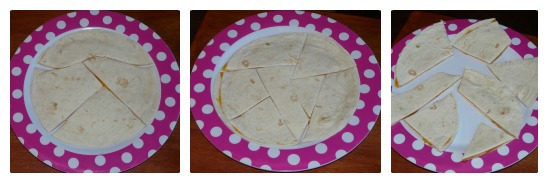
1. Microwave tortillas and cheese for 30-45 seconds, depending on your microwave.
2. With a pizza slicer, cut your quesadilla into different shapes. As with the other puzzles, you control how difficult it will be.
Puzzle #5: A Floor Puzzle
Go big or go home? Well, let’s go big then for a large floor puzzle. This isn’t your average table-top puzzle.
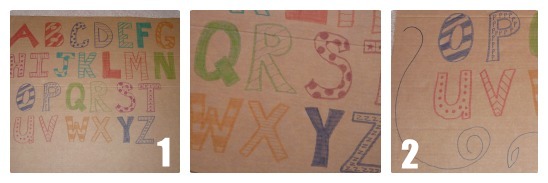
1. On a large piece of cardboard (our piece was about 2.5 x 3 feet), write the alphabet, draw a picture . . . let the creative and artistic juices flow. My artistic abilities go as far as different colors and different styles for each letter. I am sure some of you will create a beautiful masterpiece for your children to assemble.
2. Fill the empty space. I used swirls to fill the open areas on our floor puzzle. This will help your child put it together more easily.
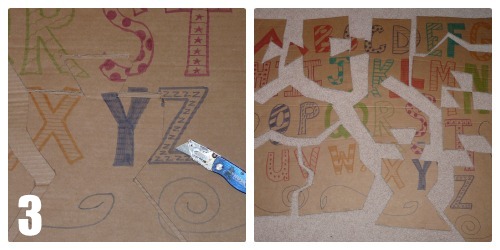
3. With another piece of cardboard underneath to protect your surface, use a utility knife to cut out your puzzle pieces. Interlocking pieces hold well with cardboard. *Take care while cutting if young children are around.
What puzzles have you made at home? Please share your ideas in the comments below.
Go here to check out our puzzle party – a perfectly fun excuse for a party.
Kristen is a fun-loving mom to two kids who keep her busy and laughing. Add her great husband and the Lord to the mix and her life is one fantastic, crazy adventure. She is a former youth leader, professional wedding and event planner and has a degree in Christian Thought/Christian Ministry. She loves long lists, diet soda and playing jokes on her husband. Kristen is the author of Teach Me To Serve: 99 Ways Preschoolers Can Learn to Serve & Bless Others. You can find her blogging at Celebrate Every Day With Me where she shares fun ideas for children’s activities, creating memorable moments and party planning. Stop by and celebrate the ‘everyday stuff’ of life. You can also connect with her on Facebook, Twitter and Pinterest.

Latest posts by Free Homeschool Deals (see all)
- Saxon Math 3 Resources - March 31, 2025
- Wonderings eZine - February 27, 2025
- All About Me Coloring Page Bundle - February 24, 2025
- FREE Valentine’s Day Printables, STEM Activities, & Experiments! - February 4, 2025
- Top 10 STEM/STEAM Activities for the Winter Months! - December 2, 2024